Dauntless Cells & Perks guide - the best Cells to use for any fight
Giving you the hard Cell

Dauntless may pit players against a variety of punishing and powerful Behemoths as a matter of course, but let's give credit: it supplies us with everything we could possibly need in order to triumph time and time again. Not just weapons and armour, but the diverse selection of Perks and Cells that bestow minor-to-whoppingly-major benefits to the Slayer what wields'em. Our Dauntless Cells & Perks guide will walk you through each of these benefits one at a time, providing exact stats for each Perk and explaining which are the best Cells to equip in the current Dauntless meta.
All this stuff about Cells and Perks is just one section of our guides series on Dauntless, all of which you can peruse from our central Dauntless guide & tips hub. There you'll find in-depth beginner's explanations and useful tips, as well as links to every other part of our series, from the best Dauntless weapons and Dauntless builds to strategies on defeating each of the Dauntless Behemoths, and much more.

Dauntless Cells guide - Perks and Cells explained
There are, in total, 48 different Perks and Cells to speak of, spread across five different categories, and each can be found in up to six tiers; so to help aid your travels through our multitude of tables and details, click on any of the below links to navigate straight to a specific section.
Dauntless Cells & Perks guide - contents
| Dauntless Cells, Perks, and Orbs explained |
| Power Cells & Perks |
| Defence Cells & Perks |
| Mobility Cells & Perks |
| Utility Cells & Perks |
| Technique Cells & Perks |
Dauntless Cells, Perks, and Cores explained
Let's first talk about the distinction between Perks and Cells, because they're not the same thing. Perks are the actual benefits bestowed upon you by a variety of Dauntless weapons, Dauntless armor, and Cells. Each Perk has 6 tiers, each of which increases the Perk's effect - but to reach the higher tiers you'll need to combine multiple sources of that perk, because a single weapon, cell, or armour piece can only hold a maximum of Tier 3 on their own.
Cells are items obtained primarily by breaking open Cores that you are rewarded with throughout your journey as a Slayer; and they can only be equipped by placing them into a weapon or armour piece's Cell slot of the correct type. They are extremely useful for pushing the overall tiers of your Perks up to the highest possible level.
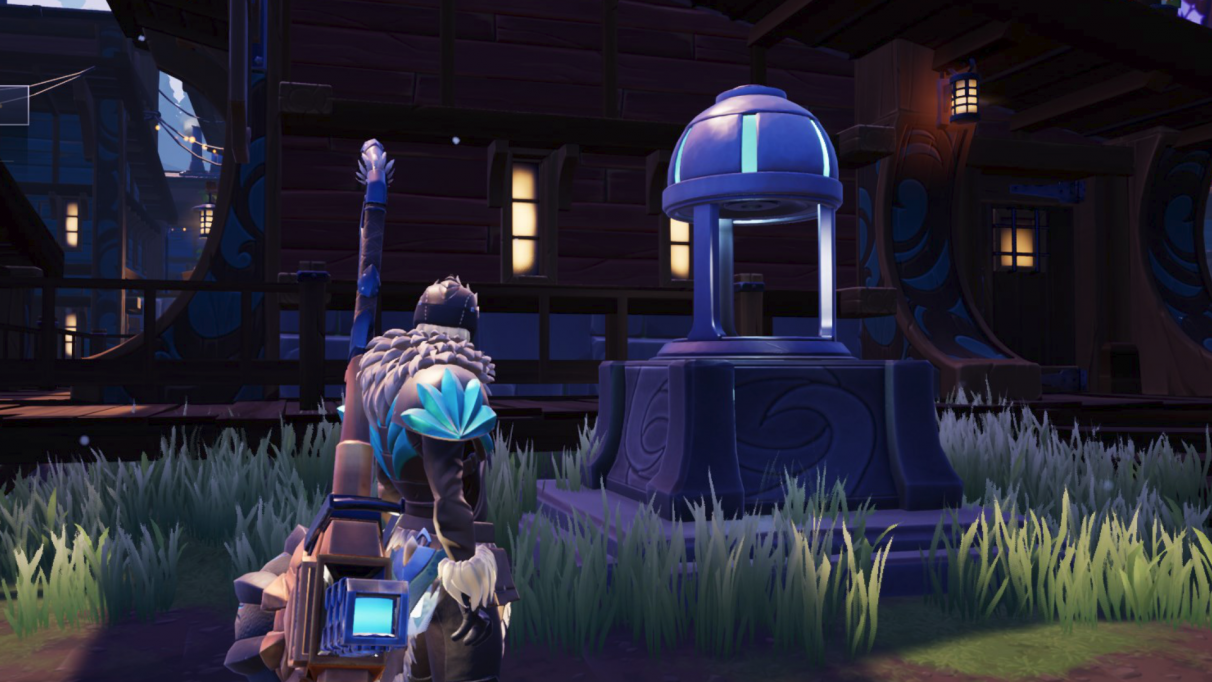
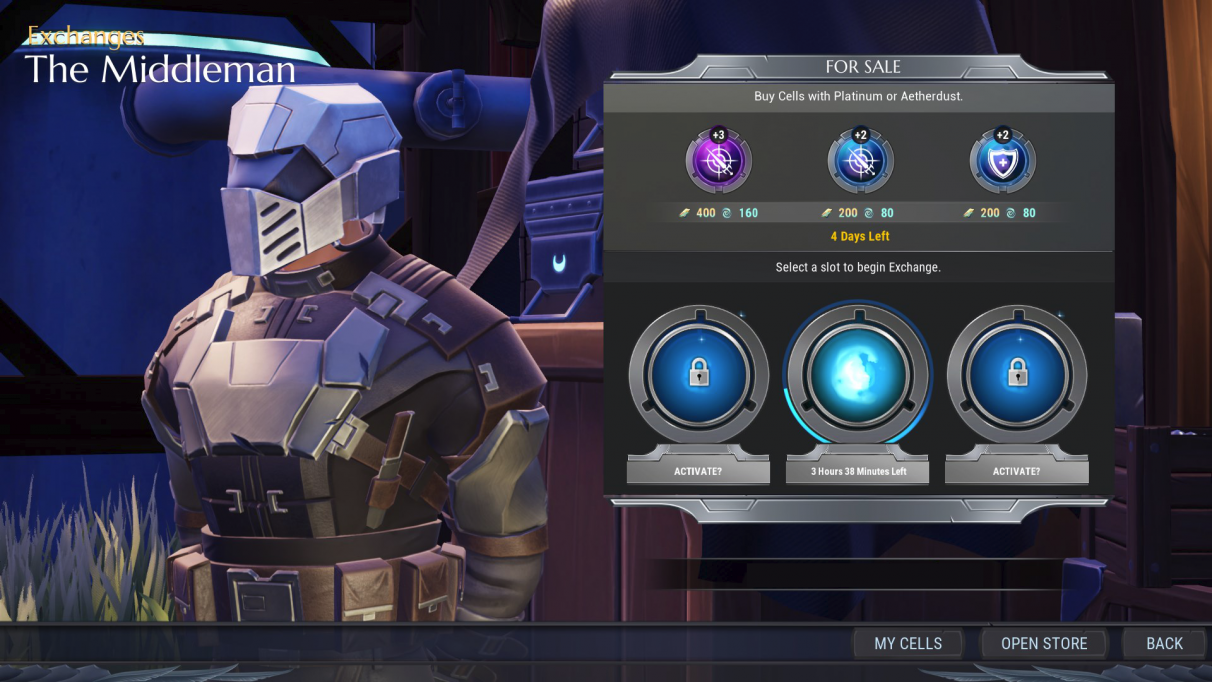
Breaking open Cores, by the way, is lovely and simple. All you need to do is walk up to one of the Core Breakers scattered throughout the hub city of Ramsgate. One can be found next to the Middleman, while another is located next to the weaponsmith and armoursmith. Core Breakers will allow you to open Cores one at a time, each of which will contain a number of new Cells. Different types and rarities of Cores will contain different types of Cells. You can also talk to the Middleman in order to combine existing Cells in order to reroll new ones:
- Combining two Tier 1 Cells will result in a Tier 2 Cell.
- Combining two Tier 2 Cells will result in a Tier 3 Cell.
- Combining two of the same Cell will create the same Cell at the next highest Tier.
- Combining two different Cells from the same class will create a random Cell from that class.
- Combining two Cells from different classes will create a random Cell from any class.
There are in total five different classes of Cells and Perks: Power, Defence, Mobility, Utility, and Technique. As you can imagine they all have different focuses which we'll get into in more detail below. But it's important to think about the kinds of Cell slots and Cells available to you when creating your Dauntless builds; sometimes having the correct Cell slots on a weapon is more important even than the weapon's power or element.
Now let's take a look at all of the Cells and Perks currently in Dauntless. Whenever you see an "X" in the below tables you can hover over it to view the exact stats for every tier of that Perk.
Power Cells & Perks
All the Power Perks allow you to deal more damage in different ways, which when it comes down to it will always be the most important thing in terms of fighting Behemoths. Power Perks are currently considered the most powerful class - or at least, the class which contains some of the most powerful perks in Dauntless.
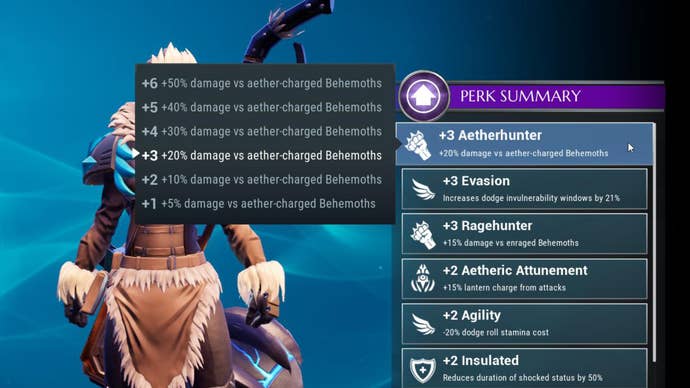
Several of them also synergise very well with one another; for example, Overpower, Knockout King, and Pacifier, all of which relate to Stagger damage. Overpower, by the way, is possibly the current strongest Perk in Dauntless, particularly when using the Stagger-heavy Hammer. Ragehunter is another favourite for maximising damage potential, and you can combine it with Aetherhunter against elemental Behemoths to turn those beasts' most fearsome aspect into their greatest weakness.
| Perk | Effect | Also found in |
|---|---|---|
| Aetherhunter | +X% damage vs aether-charged Behemoths. | All Charrogg and Valomyr weapons, Charrogg armour (Body), Valomyr armour (Legs) |
| Deconstruction | +X% damage vs objects created by Behemoths. | Kharabak Axe/Hammer |
| Knockout King | +X% Stagger damage. Tiers 4-6: After dodging through an attack, next weapon attack gains +X% Stagger damage. | Skarn Sword/Axe/Hammer, Pangor Sword/Axe/Hammer, Pangar armour (Head/Arms) |
| Overpower | +X% damage vs staggered Behemoths. | All Hellion weapons |
| Pacifier | +X% Stagger damage vs enraged Behemoths. | None |
| Rage | When under X% health, deal +X% damage. | Charrogg armour (Arms/Legs), Boreus armour (Torso/Arms), Shrowd armour (Head/Torso) |
| Ragehunter | +X% damage vs enraged Behemoths. | All Gnasher weapons, Gnasher armour (Arms), Hellion armour (Head) |
| Sharpened | +X% Part damage. Tiers 4-6: after dodging through an attack, next weapon attack gains +X% Part damage. | All Koshai weapons, Drask armour (Arms) |
Defence Cells & Perks
Defence Cells are best used to help you out of tight spots with certain Behemoths. The Perks in this class are - surprise surprise - defensive in nature, and many of them seek to mitigate certain negative status effects that Behemoths can dish out. Nine Lives and Tough are particularly useful Perks in any situation, but many of the others, such as Warmth or Insulated, should be customised based on the Behemoth you're fighting next.
| Perk | Effect | Also found in |
|---|---|---|
| Assassin's Vigour | Heal X when you break a Behemoth part. | None |
| Bloodless | Tiers 1-2: Reduces duration of Wounded status by X%. Tiers 3+: Immune to Wounded status. Tiers 4-5: Reduces effectiveness of Crippling Wounded status by X%. Tier 6: Immune to Crippling Wounded status. | Gnasher armour (Head), Shrike armour (Legs) |
| Fireproof | Tiers 1-5: Reduces duration of On Fire status by X%. Tier 6: Immune to being set on fire. | Charrogg armour (Head), Embermane armour (Arms) |
| Fortress | Grants an X health shield after not getting hit for 10s. | Hellion armour (Legs), Pangar armour (Torso), Skarn armour (Arms) |
| Guardian | X% of any shield applied to you is also applied to your nearest ally for 15s. | Skarn armour (Torso/Legs) |
| Iceborne | When under 50% health grants +X% decreased damage taken. Tier 4+: While Iceborne is active, grants X% lifesteal that cannot heal beyond 50% health. | Boreus armour (Legs) |
| Insulated | Tiers 1-5: Reduces duration of Shocked status by X%. Tier 4: Reduces knockback and damage of hitting electrified shields. Tiers 5-6: Prevents knockback and damage of hitting electrified shields. Tier 6: Immune to Shocked status. | Nayzaga armour (Legs), Stormclaw armour (Arms) |
| Nine Lives | +X% chance to halve incoming damage. Tier 4+: The first time you would be knocked out, stay up and heal for 400. Tier 6: After you cheat death, become empowered for 10s. | Valomyr armour (Torso), Shrowd armour (Legs) |
| Shellshock Resist | Tiers 1-5: Reduces Shellshock explosion damage and status effect duration by X%. Tier 6: Immune to Shellshock explosion damage and status effect. | Quillshot armour (Legs), Kharabak armour (Head) |
| Sturdy | Prevents you from being staggered (X second cooldown). | None |
| Tough | Increases Max Health by X. Increased healing from all sources by X%. | Gnasher armour (Torso/Legs), Skarn armour (Head) |
| Warmth | Tiers 1-2: Reduces duration of Frozen status by X%. Tier 3+: Immune to being Frozen. Tiers 4-5: Reduces duration of Chilled status by X%. Tier 6: Immune to being Chilled. | Skraev armour (Arms), Pangar armour (Legs) |
Mobility Cells & Perks
Mobility Cells help you out whenever it comes to avoiding attacks and repositioning yourself during a fight. Most of them affect Stamina in some way, which makes this class of Cell more useful when you're using a very Stamina-hungry weapons, such as the War Pike or Chain Blades. Shoutout also to Evasion, a particularly useful pickup for newer players still struggling with the timing of their dodges.
| Perk | Effect | Also found in |
|---|---|---|
| Agility | -X% dodge stamina cost. | Koshai armour (Head), Rezakiri armour (Legs) |
| Conditioning | +X stamina regeneration. | All Shrike/Boreus weapons, Boreus armour (Head), Kharabak armour (Arms/Legs) |
| Endurance | Increases max stamina by X. | None |
| Evasion | Increases dodge invulnerability window by X%. | Shrike armour (Head/Torso), Embermane armour (Legs), Riftstalker armour (Arms) |
| Fleet Footed | Following a dodge, movement speed is increased by X% for 3s. | Skraev armour (Head), Drask armour (Legs) |
| Nimble | Gain X stamina after dodging through an attack. | All Skraev weapons |
| Swift | While sheathed, increases movement speed by X%. Tier 6: Also affects other nearby Slayers. | None |
Utility Cells & Perks
Utility Cells are never very powerful on their own, but when combined with the right weapon or playstyle or other aspects of your loadout, they begin to reveal their true worth. Energized is an excellent Perk for weapons such as the Sword and War Pike as it allows you to fill up your weapon meter much faster. Vampiric is another great pickup for the War Pike, because it takes advantage of the War Pike's natural wounding abilities - while Stunning Vigour does the same but for staggering, making it more suitable for Hammers.
| Perk | Effect | Also found in |
|---|---|---|
| Aetherborne | 25% chance not to consume an Aether Vent charge on use. X additional Aether Vent healing. | None |
| Aetheric Attunement | +X% Lantern Charge. | All Drask weapons, Stormclaw Hammer, Drask armour (Head/Torso), Nayzaga armour (Arms), Riftstalker armour (Head) |
| Aetheric Frenzy | +X Lantern Charge on hit. | Stormclaw armour (Legs) |
| Conduit | Using your lantern hold ability grants +X% attack speed to all Slayers for 8 seconds. | Rezakiri armour (Head/Arms), Riftstalker armour (Torso/Legs) |
| Energized | +X% weapon charge rate. | All Stomclaw weapons (except Hammer), Stormclaw armour (Head/Torso) |
| Lucent | Your Flask heals over 20 seconds, but for 20% increased healing. While this heal is active, generate X Lantern Charge each second. | Valomyr armour (Head/Arms) |
| Medic | When reviving an ally, they are healed an additional X%. Tiers 4+: +66% revive speed. Tier 6: Grants a 300 health shield for 20s after reviving an ally. | Nayzaga armour (Head/Torso), Shrowd armour (Arms) |
| Stunning Vigour | Heal for X whenever a Behemoth is Staggered. | None |
| Vampiric | Heal for X whenever a Behemoth is Wounded. | None |
Technique Cells & Perks
Technique Perks are much like Power Perks, but slightly more focused, relying upon certain techniques to unleash their full effect. Acidic and Savagery are both extremely powerful and synergising pickups at higher levels (particularly when combined with the War Pike), while Cunning and Predator remain two of the most powerful Perks in Dauntless in pretty much any situation.
| Perk | Effect | Also found in |
|---|---|---|
| Acidic | Converts X% of Part damage to Wound damage. Tiers 4+: +X Part damage. | All Quillshot weapons |
| Adrenaline | Grants X% increased damage for every 10 stamina missing. | Skraev armour (Torso/Legs) |
| Barbed | +X Wound damage on hit. Tier 4+: After dodging through an attack, the next attack's expose damage is increased by X. | Nayzaga Sword/Chain Blades/War Pike, Quillshot armour (Arms) |
| Bladestorm | +X Part damage on hit. Tier 4+: +X Part damage after dodging through an attack. | Kharabak Sword/Chain Blades/War Pike, Kharabak armour (Torso) |
| Cunning | +X% critical strike chance (2x damage). | All Rezakiri weapons, All Shrowd weapons, Rezakiri armour (Torso) |
| Evasive Fury | +X% attack speed for X seconds after dodging through an attack. | All Embermane weapons, Embermane armour (Head/Torso), Koshai armour (Arms) |
| Merciless | +X Wound damage vs Staggered Behemoths | None |
| Molten | Dealing damage generates a Molten Heart on a X second cooldown. Each Molten Heart lasts 8.5 seconds and increases attack and movement speed by 20% - and makes the user immune to fire. | Hellion armour (Torso/Arms) |
| Predator | +X% damage after not getting hit for 15s. Bonus removed when hit. | Koshai armour (Torso/Legs) |
| Savagery | +X% damage vs Wounded parts. | Nayzaga Axe/Hammer, Quillshot armour (Head/Torso) |
| Weighted Strikes | +X Stagger damage on hit. Tier 4+: +X Stagger damage after dodging through an attack. Tier 6: Ranged swings and missiles interrupt unstable Behemoth attacks. | Skarn Chain Blades/War Pike, Pangar Chain Blades/War Pike, Shrike armour (Arms) |
| Wild Frenzy | When under X% health, +X% attack speed. | All Riftstalker weapons |
Well, there you have it. That's every single Cell and Perk currently in Dauntless. Hopefully you've learned a thing or two about which Cells it would be best to prioritise when putting together your loadout for the next hunt. And speaking of which, now would be a great time to head over to our Dauntless builds guide for tips on how to put together the very best synergies between Perks, weapons, armour, specials, and potions.