Doom: The Dark Ages - All Sentinel Barracks secrets (Chapter 4)
How to find all 6 secret locations in the Sentinel Barracks


Looking to find all 6 Sentinel Barracks secrets in Doom: The Dark Ages? Chapter 4 of Doom: The Dark Ages has only a small handful of hidden areas - considerably fewer than Chapter 2, in fact - but they're all fairly well hidden and easy to miss. What's more, there are a lot of different "Points Of No Return" in Chapter 4, so it's very easy to go a little too far during all your ripping and tearing, and then realise you've missed something of vital importance behind you.
That's where this guide comes in. At RPS we've been hard at work tracking down every last secret and collectible location in each of Doom: The Dark Ages' 22 chapters. So if you want to make sure you don't miss a thing during your 100% playthrough, read on for our walkthrough of all 6 Sentinel Barracks secrets and where to find them.
| Find a different chapter's secrets! | |
|---|---|
| Previous: Chapter 3 (no secrets) | Next: Chapter 5 |
| Click to show all chapters | |
| Chapter 1 | Chapter 12 |
| Chapter 2 | Chapter 13 (no secrets) |
| Chapter 3 (no secrets) | Chapter 14 |
| Chapter 4 | Chapter 15 |
| Chapter 5 | Chapter 16 |
| Chapter 6 | Chapter 17 |
| Chapter 7 | Chapter 18 |
| Chapter 8 | Chapter 19 |
| Chapter 9 | Chapter 20 |
| Chapter 10 | Chapter 21 (no secrets) |
| Chapter 11 | Chapter 22 |
| Doom: The Dark Ages secrets walkthrough hub | |
All Sentinel Barracks secrets (Chapter 4)
Below is the full list of all 6 secrets hidden within the Sentinel Barracks (along with one extra easy-to-miss area), and exactly where to find each one in Chapter 2 of Doom: The Dark Ages:
| Secret | Location | Reward | Found? |
|---|---|---|---|
| Secret 1 | Left of the Shield Soldier Corridor | "Hell Knight" Toy, 13x Gold | |
| Secret 2 | Adjacent to the Green Button room | 53x Gold | |
| Secret 3 | Corridor before first Point Of No Return | Life Sigil, 24x Gold | |
| "Point Of No Return" 1 | |||
| "Point Of No Return" 2 | |||
| Secret 4 | Inside tower by burning tree | Life Sigil | |
| Secret 5 | Hidden platform below broken bridge | 1x Ruby, 20x Gold | |
| Secret 6 | Staircase round back of building | "Nightmare" Skin for Accelerator | |
| "Point Of No Return" 3 | |||
| Bonus 1 | Left of the Sentinel Shrine at end of level | "Sentinel Barracks" Codex | |
If you're stuck trying to find any particular secret, you can check the above map for a visual reference of where each secret can be found throughout Chapter 4; and we've also got full descriptions on where to find all 6 secret areas below.
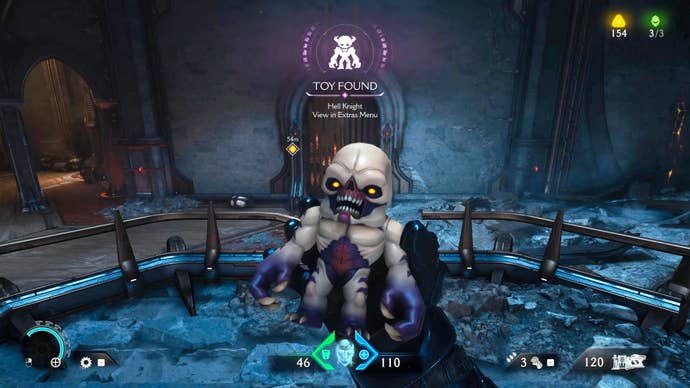
Secret 1: Left of the Shield Soldier Corridor (Toy, Gold)
- Location: In the corridor filled with Shield Soldiers.
- Solution: Shield Charge the breakable wall near the entrance.
- Reward: "Hell Knight" Toy, 13x Gold
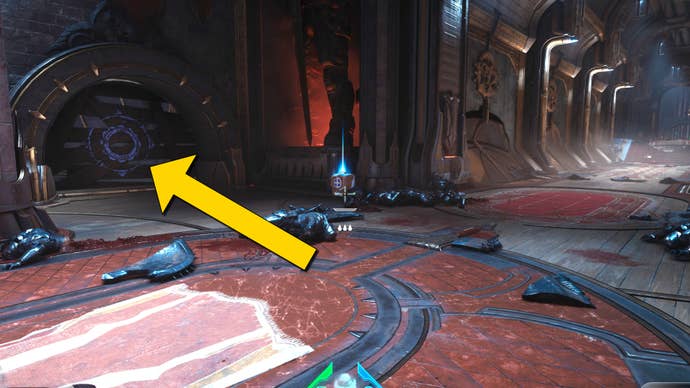
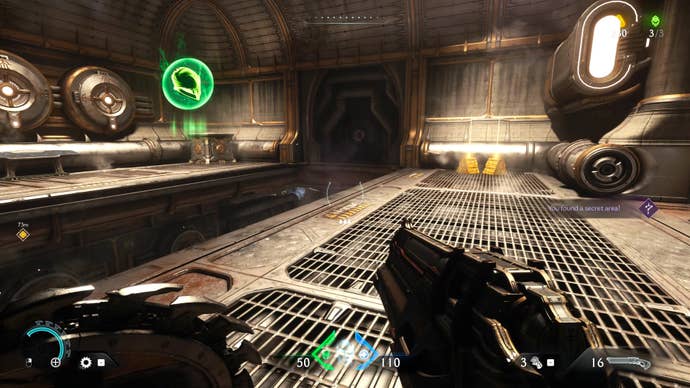
To find the first of the Sentinel Barracks' secrets, proceed through the level until you reach two demon fights in quick succession, the second against a mancubus up some stairs outdoors. Once you're there, head into the nearby building and you'll find a long corridor filled with Shield Soldier demons to kill with your Shield Saw.
Once you've dispatched the demons, go back to the start of this corridor and look to your left. In front of a small pile of gold is a breakable wooden wall that you can Shield Charge through to reach the secret area. This secret area contains a smattering of Gold totalling 13x Gold pieces, along with a Hell Knight Toy collectible. You can then exit outdoors and climb the steps to reach the area where you fought the Mancubus again.
Secret 2: Adjacent to the Green Button room (Gold)

- Location: On a ledge in the room adjoining the Green Button room.
- Solution: Shield Charge the large cube into place, then climb it.
- Reward: 53x Gold
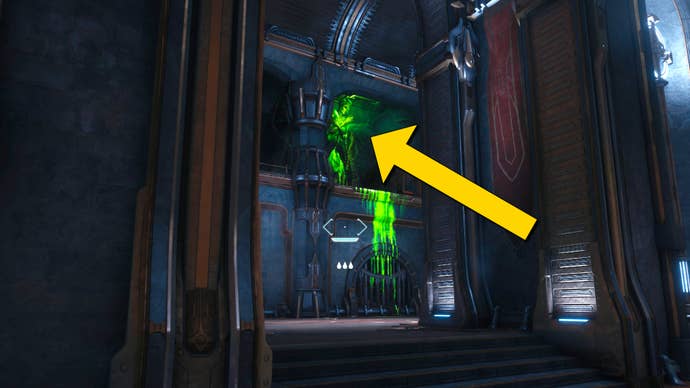
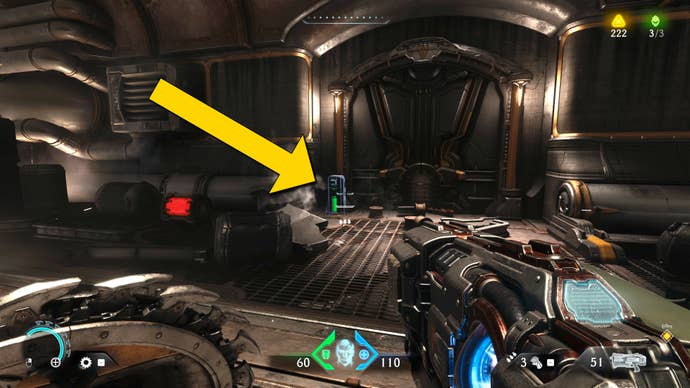
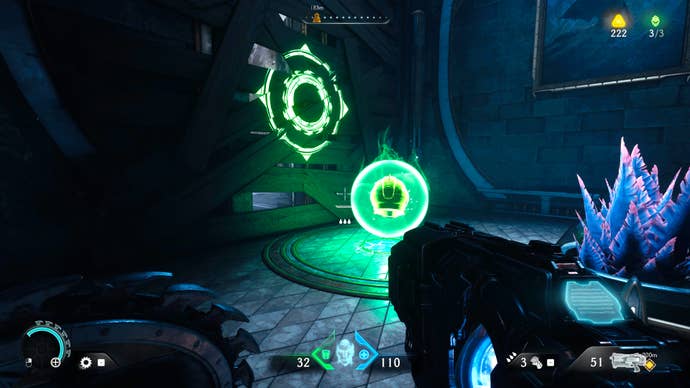
The second secret of Chapter 4 is very near the first. Head through the corridor with all the Shield Soldiers, and you'll find a room with a green button on the floor. To the left of that room is a smaller room where you can reach the upper ledge by targeting the Green Flesh Node above you with a Shield Throw.
Hop up to that ledge, then head along it and drop down in front of the large metal cube. You can then Shield Charge the cube to knock it away and into position by a ledge in the opposite room. Follow its path and then climb up the cube to reach the secret area and access to the 53x Gold now within your reach.
Secret 3: Corridor before Point Of No Return (Life Sigil, Gold)


- Location: In the corridor preceding the first "Point Of No Return".
- Solution: Interact with the lever by the side door.
- Reward: Life Sigil, 24x Gold
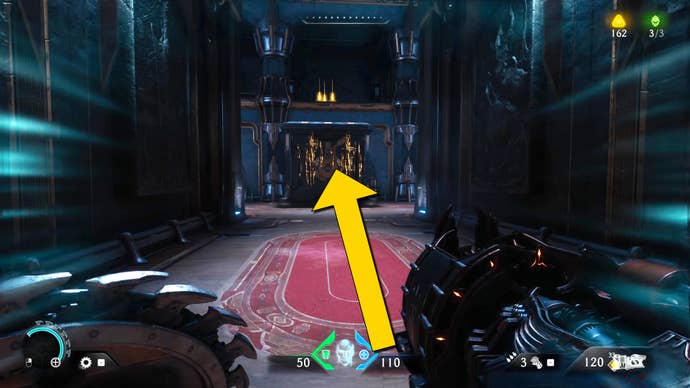
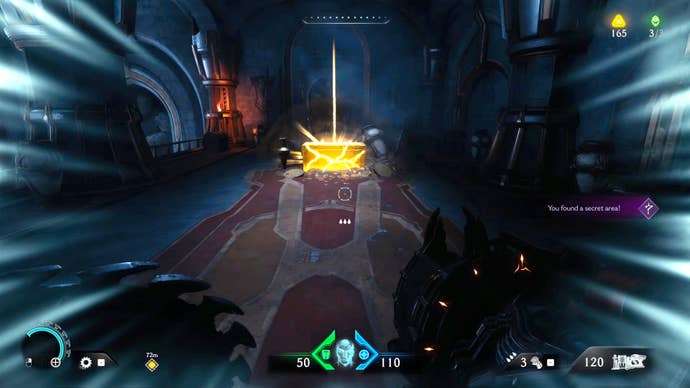
The Sentinel Barracks' third secret lies just before the chapter's first "Point Of No Return", so make sure you don't cross this point before you've found it. In the corridor that leads to the "Point Of No Return" icon, look around once you've cleared the room of demons and you should see a subtly glowing terminal by one of the side doors. Interact with it to open the door.
Inside you'll be accosted by three more enemies; once they're dead, climb the wall in front of you and take either path upwards (they both lead to the same place). At the top you'll find the secret area containing a Life Sigil and two blocks of Gold to the side. You can then drop down the hole in the floor to reach the corridor again.
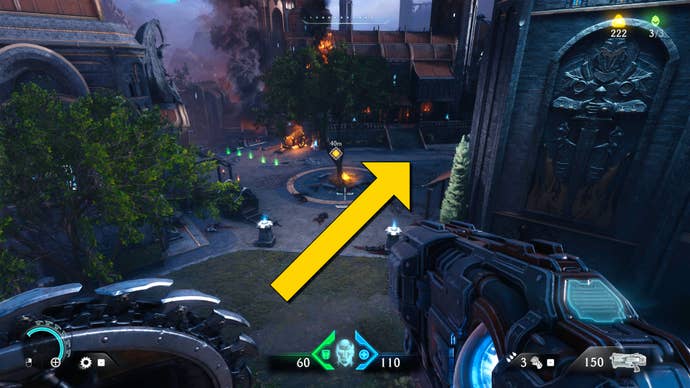
Secret 4: Inside tower by burning tree (Life Sigil)


- Location: In the small tower outdoors, near the burning tree.
- Solution: Jump off to the left at the broken bridge.
- Reward: Life Sigil
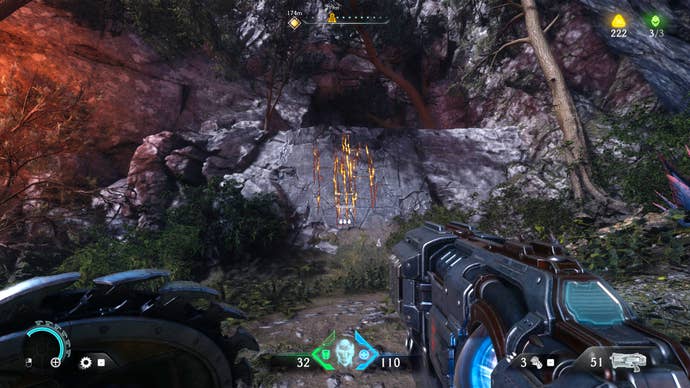
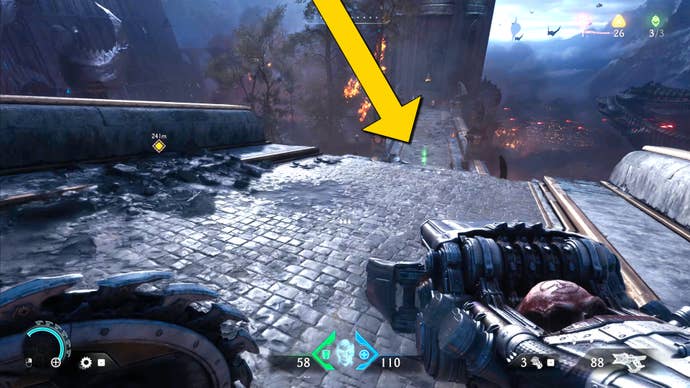
This secret can be found after the next two "Points Of No Return". You'll finally reach the outdoors again, and drop down a couple of ledges to fight some demons. In front of you is a broken bridge, beyond which is a large burning tree. And to your left is a small tower, which houses the secret area you're trying to reach.
To reach this secret, head left at the start of the broken bridge, and jump over to the lower grassland platform left of the bridge. There's a climbable wall there, and you can follow that path all the way to the interior of the tower, where you'll find a Life Sigil and a breakable door taking you back to the base of the bridge again.
Secret 5: Hidden platform below broken bridge (Ruby, Gold)

- Location: Below the broken bridge past the Mancubus Leader.
- Solution: Jump down one level, then turn round and jump down again.
- Reward: 1x Ruby, 20x Gold
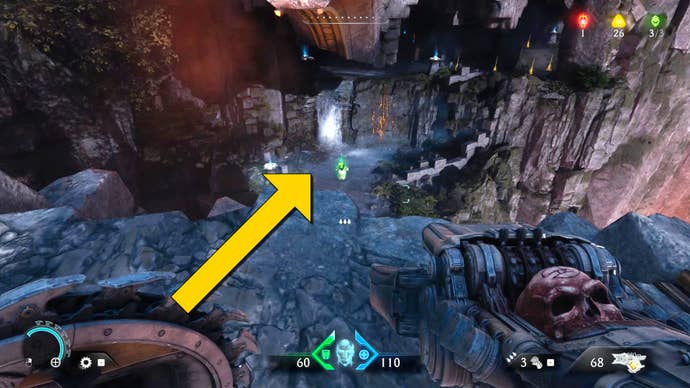
Use the Green Flesh Node to jump over to the burning tree, where you'll fight another group of demons and a Mancubus Leader demon. Just beyond that, you'll come to another broken bridge. Drop down to the middle section of bridge, then turn directly around and jump over to the hidden lower section to reach this secret area.
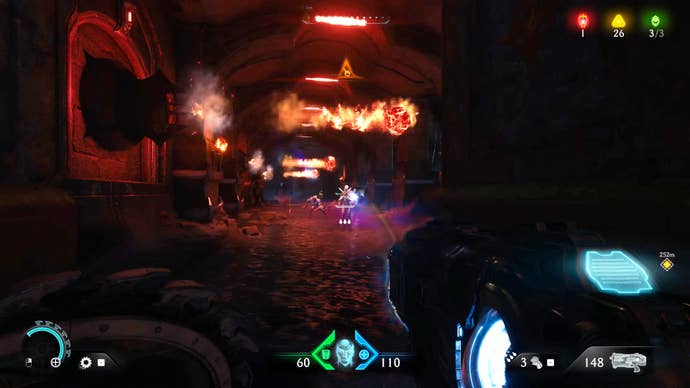
Follow the path through a corridor of demons and projectiles (and remember to pick up the Gold on your right as you go), and you'll eventually make your way up to the true "secret" area, where you can kill a group of praying cultists and collect a Ruby from a nearby statue.
After that, you can use the climbable wall on the left of the secret area to reach another pile of Gold, and drop back down to the start of the broken bridge again.
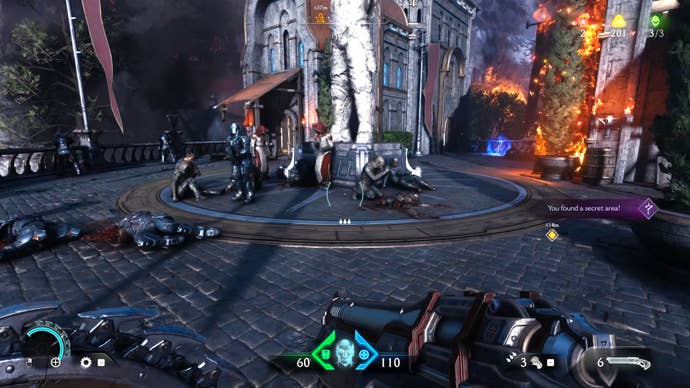
Secret 6: Staircase round back of building (Skin)

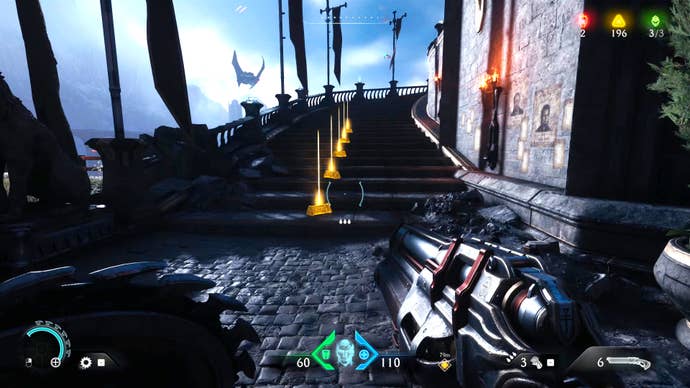
- Location: Just before the final "Point Of No Return" drop.
- Solution: Ascend the stairs round the back of the building.
- Reward: "Nightmare" Skin for Accelerator
The final secret area of Chapter 4 isn't too hard to find, but it comes right before a large drop that isn't immediately obvious as a "Point Of No Return", so you can easily jump down before you realise that there's no way back up. So be warned!
Proceed through the rest of the Sentinel Barracks until you jump down to a few buildings surrounding a circular area of street with a small tree at its centre. Head round the back of the right-hand building and you'll see a staircase with a line of Gold leading you up. Ascend the staircase to find the secret area, and collect the pickup at the back of the area to unlock the "Nightmare" Skin for your Accelerator weapon.
Bonus: "Sentinel Barracks" Codex


- Location: Left of the Sentinel Shrine at end of level.
- Solution: Turn left at the Sentinel Shrine and follow the path.
- Reward: "Sentinel Barracks" Codex
This bonus hidden area doesn't count as a "secret", but if you're looking to 100% the Sentinel Barracks you'll need to make sure you find it, because it contains the "Sentinel Barracks" Codex pickup.
In truth, this area is hard to miss. Progress to the very end of Chapter 4, where you'll find a large gate with a section of breakable wooden wall in its centre; and there's also a Sentinel Shrine to the left. Head down the path right next to the Sentinel Shrine, and round the corner you'll find the last few Gold pieces of Chapter 4, and the Codex entry to round off the chapter.
That concludes this guide to all the secrets in Chapter 4: the Sentinel Barracks. Before you move on, make sure you managed to track down all 11 Chapter 2 secrets previously in your playthrough. And if you're ready, you can head over to our Chapter 5 secrets walkthrough!