Monster Hunter Wilds: Chapter 3-1 walkthrough
Uncover a sci-fi mystery in the Chapter 3-1 walkthrough

Not sure how to beat certain Chapter 3-1 Monster Hunter Wilds monsters? We've got tips and tricks to guide you in the right direction, while also alerting you to the right elements for each new monster in this walkthrough.
Chapter 3-1 goes interesting places with the overarching story of Monster Hunter Wilds while also introducing a new variant to fight. This leads to a fun new mechanic you can take advantage of. Read on to learn more.

Our walkthrough hub links to every Monster Hunter Wilds chapter guide. You can also get to each Chapter 3 guide via the below links:
- Chapter 3-1
- Chapter 3-2
- Chapter 3-3
- Chapter 3-4
- Chapter 3-5
Born from the Flame walkthrough
Born from the Flame objectives
- Talk to Rosso in the Windward Plains
- Optional: Talk to your Guildmates 0/6
Catch up with each of your guildmates before continuing if you want to complete the optional objective. Before you talk to Rosso, resupply and upgrade your gear. Speaking with him will complete Born from the Flame and send you right into another hunt.
The upcoming fight has an uncommon status effect, Defense Down. You'll need any item that can increase your defence to remove it. Examples include Adamant Seeds, Armorskin, Armor Ammo, etc. Otherwise, if you want to match your gear to the fight, you can use each of these elements for additional damage: Fire, Ice, Thunder, Dragon.
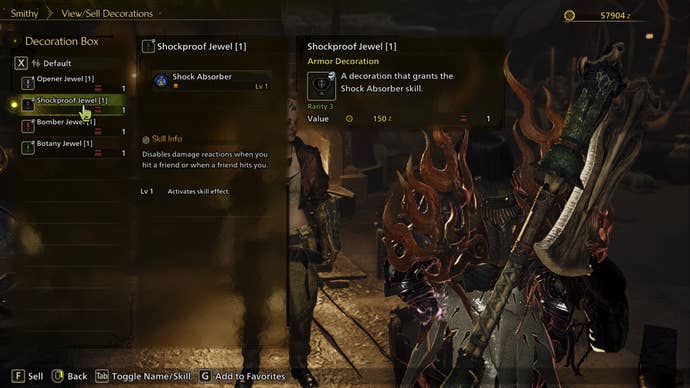
You may have also noticed after completing the previous chapter that you've unlocked decorations at Gemma. These are a new item type that you can attach to weapon and armour slots for skills. While you may not have any slots yet, Gemma will give you a Shockproof Jewel decoration. This prevents interrupting friends when hitting them and vice versa.
The Faithful Keepers walkthrough
The Faithful Keepers objectives
- Follow Nata
- Slay the Doshaguma [???]
- Talk to Nata
- Follow Nata
- Slay the Rathalos [???]
- Follow Tasheen>
- Talk to Tasheen
- Optional: Take a look around Sild
- Follow Tasheen
- Repel the Guardian Arkveld
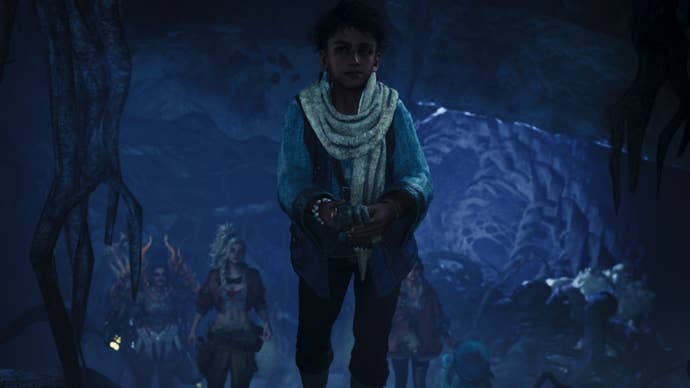
Follow the linear path with Nata until you reach a cutscene where a familiar monster isn't quite right. This leads to an abnormal Doshaguma fight where you'll learn they're stronger and function a bit differently.
Tips for the Doshaguma [???] fight
While some of this Doshaguma's attacks are similar to the normal version, you can expect to see explosions now. For example, when they swipe down at you, the floor will explode, creating a crystal wall. This is a new side effect that many new monsters will have.
The trick is to hit these crystal walls with elemental attacks or slinger ammo to make them explode. Each element has a different explosion associated with it, and when they explode, they'll trigger nearby walls as well. This creates a fun chain reaction that can deal massive damage.
On the topic of massive damage, this Doshaguma variant is kind enough to telegraph certain attacks even more now. If you ever hear a loud high-pitched ringing sound, an attack with an explosive blast is incoming. This can be an explosive slam downward or a blast in a straight path towards you.
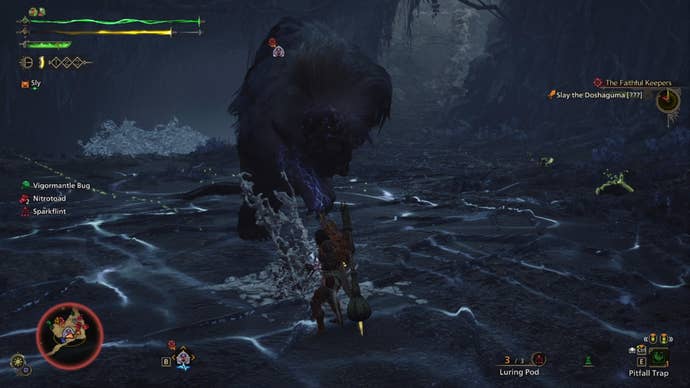
If you're wondering how this Doshaguma inflicts Defense Down, they have a slobber spray that they spit forward. If you don't have any items to gain defence, you can get some Adamant Seeds from your Seikret.
Aside from all that, your character will eventually warn you that wounds are regenerating so you should focus on them. However, I've fought many monsters like this and the wounds don't seem to regenerate quickly. While I'm sure they do regenerate, it doesn't seem to be fast.
Resupply at camp for the next fight
Now that you have access to decorations, you'll gain more from monster fights. You may have noticed after your hunt that you gained Mystery Orbs that were then appraised into decorations. If you have slots on your gear make sure you know that there are both weapon and armor decorations.
And if you're anything like me, you'll probably want to craft new gear from the Doshaguma fight. Unfortunately, until we know what the deal is with this new variant, we can't use those materials.
Before leaving camp, resupply your items to prepare. The two elements you can take advantage of are Thunder and Dragon for the next fight. I'd recommend bringing Antidotes, Nulberries, and the usual helpful items like Flash Pods and traps. If you don't have a ranged weapon, definitely make sure you have Flash Pods.
Once you're ready to depart, speak with Nata and embark on a short trip. After about a minute, a cutscene will trigger the next encounter.
Tips for the Rathalos [???] fight
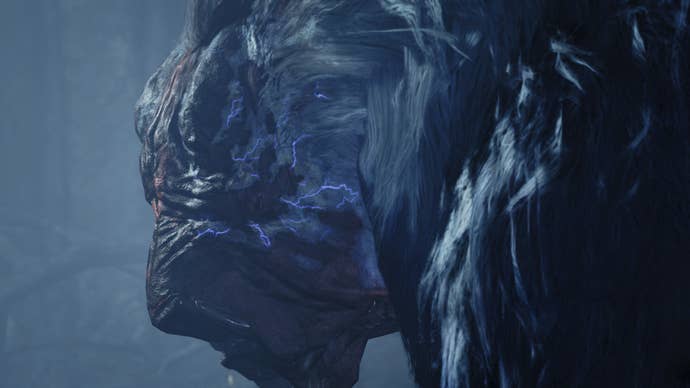
![A Monster Hunter Wilds screenshot zoomed in on a Rathalos with [???] next to their name as they pulsate with electric energy.](https://assetsio.gnwcdn.com/Monster-Hunter-Wilds-Chapter-3-1-5.jpg?width=690&quality=70&format=jpg&auto=webp)
Similar to the previous fight, this Rathalos is fueled with a mysterious energy imbuing many of their attacks with explosions. Alongside those explosions are the same crystal walls we blew up previously using elemental attacks. Try to watch your environment for slinger ammo and any other useful hazards.
Unlike the Doshaguma, however, the Rathalos will try to blow up their crystal walls. They have a few fire attacks that can cause the walls to explode. These include large fireballs while flying, a fire breath surrounding them, and the occasional quick fire breath forward. Therefore, avoid these attacks and any inflamed crystal walls.
Aside from the crystal walls, your main issue may be the Rathalos' flight. This of course depends on your weapon, as some are more suited to dealing with flying monsters. Fortunately, you can use Flash Pods to knock them down and deal damage. Which also gives you an opportunity to use traps, too.
When they're not flying, you'll have an easier time targeting their mouth and legs, which are a weak point. But, you can also try to break their wings to potentially impact their flying. Another good time to bash the Rathalos is when they have a large white aura around them and aren't moving. During this moment, they're draining energy from the floor and are vulnerable.
Reuniting with Tasheen and the Keepers

You'd think Chapter 3-1 would be over but we've still got another monster before it ends. Once you've slain the Rathalos, you can explore the Keeper's town of Sild to progress the story. Similar to previous objectives, speaking with Tasheen will place you into another hunt. Make sure you resupply and get ready before leaving.
This upcoming fight is tough, but it's only a repel hunt so it's a little easier. You'll still want to upgrade your gear and prepare as much as you can. I recommend bringing Nulberries, Armorskin potions, and Demondrug potions. And if you want extra damage on top of that, use the Dragon element.
Tips for the Guardian Arkveld fight
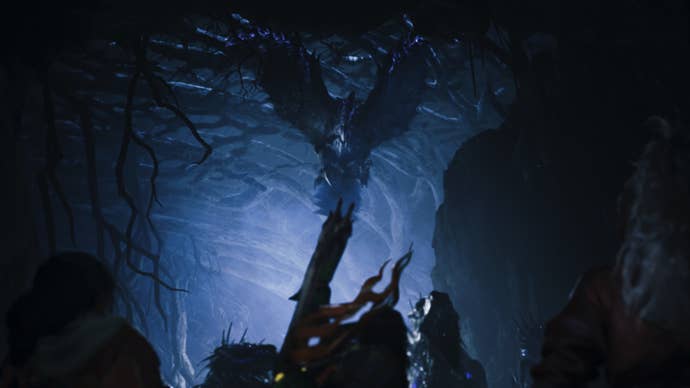
Arkveld has a lot of strong attacks that will knock you down, which makes for a difficult fight. Not to mention, the area you're fighting in is small, giving you less room to play with. Fortunately, there is a large pillar that you can circle to create a gap when needed. This works for healing, sharpening, and using any other items.
When fighting Arkveld, I recommend targeting the chainblades that they whip around. These are a weak point that you can break to make your life a little easier. It's not always easy, but there are occasional vulnerable moments where Arkveld leaves them out. For example, they have an attack where they whip one forward, pull it back, whip the second, and then leave it out for a moment.
This attack doesn't give you much time to attack but you'll find similar opportunities. One really good moment is when Arkveld slams both chainblades down the centre. As long as you don't get hit, you'll have plenty of time to hit them.
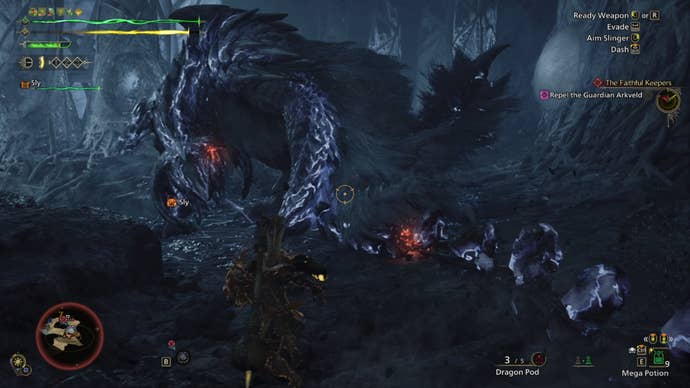
Building off of previous monster fights, you'll have crystal walls that you can explode again. Despite being stuck in a small area, there are sources of slinger ammo to grab. If you don't already know, use them to shoot the crystal walls. Another recurring mechanic is a high-pitched sound, which Arkveld wmits while exuding a white aura and leaping forward with a 180-degree chainblade swipe. When this occurs, get out of the way as quickly as you can.
As long as you've kept up with upgrading your gear, you'll likely be able to survive any one-hit attacks. And then at worst, the fight becomes a case of trial and error while healing. Part of what makes this a tough fight is the fact that Arkveld can hit everywhere near them and far away too, which makes positioning tough. This forces you to notice vulnerable moments and as always, break wounds!
Once you've repelled the Guardian Arkveld, Chapter 3-1 is complete. Continue onto the Chapter 3-2 Monster Hunter Wilds walkthrough for more guidance. Or you can return to the walkthrough hub for many of our guides.
← Back to Chapter 2.4 Walkthrough
→ Continue to Chapter 3.2 Walkthrough