Monster Hunter Wilds: Chapter 1-3 walkthrough
Journey to a new region in Chapter 1-3 while using our guide.

Having trouble with Chapter 1-3 in Monster Hunter Wilds or just need a little help? This chapter reveals a new region with two new monsters to fight and two main missions.
Monster Hunter fans may recognize one returning monster while also experiencing a monster type that hasn't been around for a while. All around, everyone is in for an interesting time that we're here to guide you through in this walkthrough.

Our walkthrough hub links to every Monster Hunter Wilds chapter guide. You can also get to each Chapter 1 guide via the below links:
- Chapter 1-1
- Chapter 1-2
- Chapter 1-3
- Chapter 1-4
- Chapter 1-5
To the Forest walkthrough
To the Forest objectives
- Head toward the forest
- Optional: Survey the locale and locate a target
- Optional: Attack the monster to start the quest
- Hunt the monster
To the Forest is a quick in-between main mission. As the game recommends, you can hunt a random monster to grind for better gear. Or you can skip that and head toward the forest. But it never hurts to get more materials forbetter weapons and armour. Otherwise, follow the mission marker to the north end of the map to complete To the Forest.
Forest Findings walkthrough
Forest Findings objectives
- Head toward the forest
- Talk to Erik
- Optional: Talk to Nata
- Head to the campsite
- Follow the Doshaguma traces
- Hunt the Lala Barina
- Talk to Gemma
- Head to the Pop-up Camp
- Go with the Lynians
- Optional: Survey the forest
- Talk to the Lynian Negotiator
- Search for the Congalala
- Hunt the Congalala
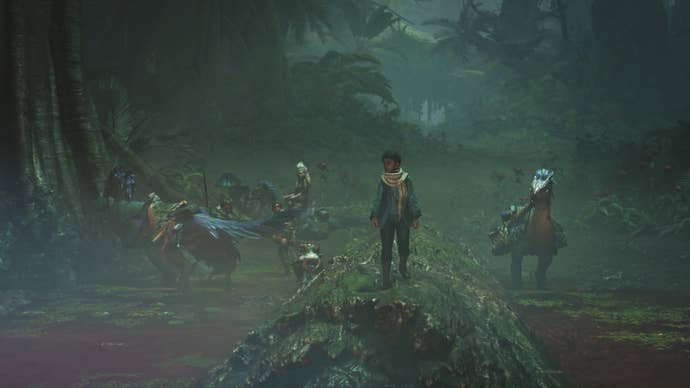
Entering the Scarlet Forest starts with a brief cutscene highlighting the new area before jumping to the new camp. Be sure to speak with both fresh and familiar characters as you explore your surroundings. Once you're ready to leave, talk to Erik and head out to set up a Pop-up Camp. You won't have your Seikret for this journey but you'll still need to stay close to the group.
With that said, you can use your Slinger to grab faraway materials, and your Capture Net if you want to catch tiny creatures. Upon reaching the Pop-up Camp spot and setting up, your crew will get back to tracking the Doshaguma. This is still a linear experience where you can follow the mission markers to interact with different clues.
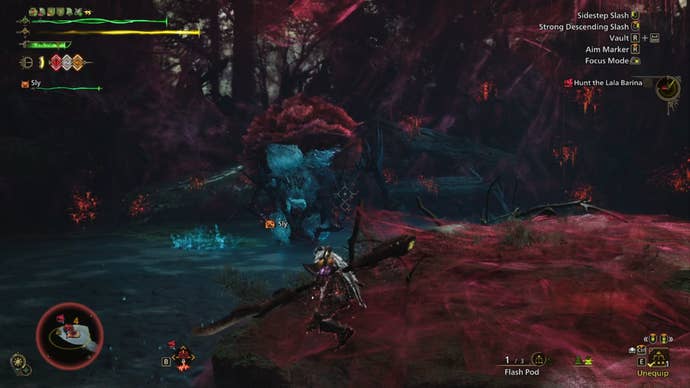
It quickly becomes clear a Doshaguma isn't the only monster in the area as Erik discovers part of a Lala Barina. Which leads us to our next battle as Erik suddenly goes missing. Unfortunately, the arachnophobia mode only impacts small monsters and other little creatures. So here's your warning that it doesn't change Lala Barina.
Tips for the Lala Barina fight

After helping Olivia save Erik from the Lala Barina, they drop down onto you. You'll need to be wary of the red florets that Lala Barina loves to fling into the air using the petals on their back. Fortunately, they heavily telegraph this move. Before becoming enraged, they'll turn around, show their bright red petals while making a melody, and then fling them out.
The good thing about this attack is that you can walk away and Lala Barina will chase you. Then, you don't have to worry about those florets paralysing you. But, when Lala Barina becomes enraged, they become a bit harder to evade. This is due to other attacks where they'll spray more of their florets in a larger area.
Aside from the florets, you can break Lala Barina's claws near their face and open up wounds on their legs. Even though their weak point is their tail stinger, which can be difficult to target, as long as you keep your weapon sharpness green, you'll deal decent damage.
Defeating Lala Barina returns you to the Base Camp, and after a cutscene, Gemma calls you over. While you don't have to upgrade anything, you can use new materials or upgrade your Palico's gear. Once you're done forging, I recommend restocking at your tent and then fast-travelling via the map to the Pop-up Camp.
This triggers another cutscene ending with you following a group of small creatures called Lynians. You'll have a few moments where you can zoom in on marked points as part of an optional objective. Eventually, you'll reach a group of Lynians to speak with. And they'll request that you deal with a monster that is likely a Congalala.
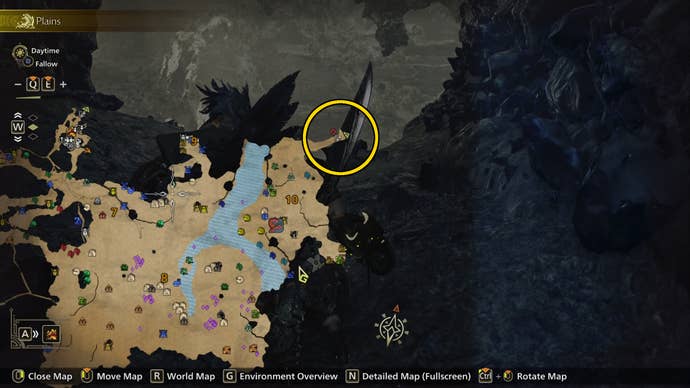
Once you finish speaking with the Lynians, you can mark the monster's location using the map to head toward them. If you already have Sleep Herbs from the plains, you should grab the Parashrooms nearby to craft Tranq Bombs. These are commonly used to capture monsters.
Tips for the Congalala fight

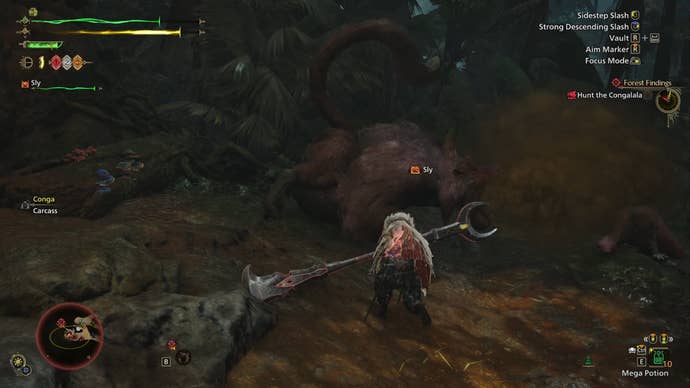
Unfortunately for you, the Lynians wake the sleeping Congalala, preventing any chance of a sneak attack. While you don't need to worry about Paralysis in this fight, we've got a new smelly status effect, Stench! In other words, Congalala will make you smell, which prevents using certain items like healing items.
You can use Deodorant or dodge in water to remove the smelly status effect. If you're playing with a Palico, they may also use Deodorant on you to remove it. Since you're unlikely to have any, you can check your Seikret's supply items for two at the beginning of this fight. Otherwise, you can wait for the effect to go away.
A quick but important tip to know about Congalala is that several of their attacks make them vulnerable. While this is the case for many monsters in Monster Hunter Wilds, Congalala makes it obvious. For example, they have a flurry attack where they claw at you four times before falling. This opens them up to a beating.
As long as you can capitalise on those opportunities while not getting hit with Stench, you can beat Congalala. The early fight is a bit of a tutorial since many of their attacks become faster when enraged. This is where you're more likely to have trouble if you can't evade or block easily.
If you're comfortable in the fight, you can target Congalala's weak point, which is their butt. Just watch out - you don't want to be on the receiving end of a fart, which will also hit you with the Stench status effect. This is telegraphed when Congalala inflates their stomach and slaps it beforehand. Use this moment to attack their side or butt immediately.
Defeating Congalala completes the main mission Forest Findings and finishes Chapter 1-3. Continue onto our next Monster Hunter Wilds walkthrough for Chapter 1-4. Or head on back to the walkthrough hub for more guides.
← Back to Chapter 1.2 Walkthrough
→ Continue to Chapter 1.4 Walkthrough