Monster Hunter Wilds: How to beat Hirabami
Learn the Hirabami's weaknesses, drop list, and more
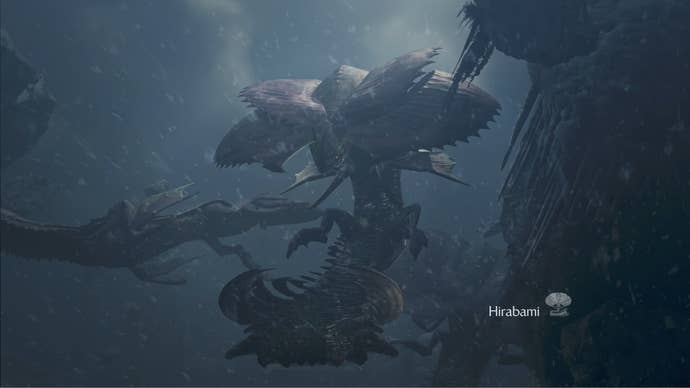

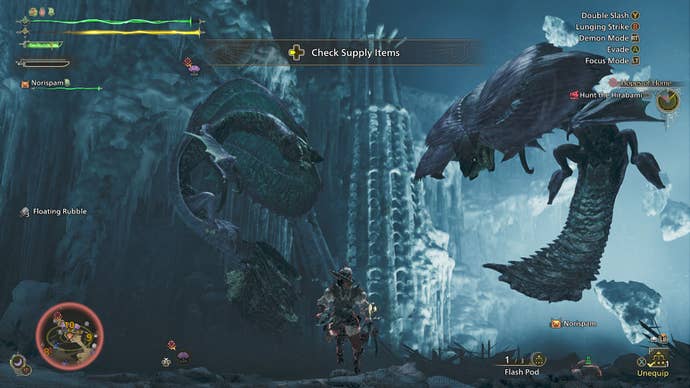
Need tips on how to beat the Hirabami in Monster Hunter Wilds? The Hirabami is a beautiful but deadly floating wyvern that acts as a rude awakening for players investigating Monster Hunter Wilds' Iceshard Cliffs. While not awful to fight on its own, this monster travels in packs, and if you don't come equipped with Dung Pods, you can easily find yourself fighting three of them at once - a nightmare ordeal that will surely annoy even experienced hunters.
With this in mind, going up against a Hirabami requires careful preparation, item management, and maybe an SOS Flare to alert some fellow hunters to your predicament. In this guide, we'll explain how to beat the Hirabami, revealing useful intel including the monster's weaknesses, the best gear to use against it, combat tips and tricks, and post-fight rewards.
In this guide:
- How to beat Hirabami
- Where to find Hirabami
- Hirabami weaknesses
- Best weapon and armor to fight Hirabami
- Hirabami tips and strategy
- Hirabami rewards and drop list

How to beat Hirabami
We'll go into more detail on all the Hirabami's weaknesses below and how to exploit them. For now, here are our top tips on how to beat the Hirabami in Monster Hunter Wilds.
- Stock up on Dung Pods and Large Dung Pods.
- Use slinger ammo or ranged attacks to knock the Hirabami out of the sky.
- Watch out for the Hirabami's icy projectiles.
- Attack the tail until the mouth becomes available.
- Take note of the environment and use loose rocks to damage the Hirabami.
Skip ahead to our tips and strategy section for more details on each of these points!
Where to find Hirabami

The Hirabami is found in the Cliffs regions of Monster Hunter Wilds. The first time you'll run into the Hirabami in the story of Monster Hunter Wilds is during the Chapter 2-3 main quest "Hopes of Home," shortly after hunting the Nerscylla. The Hirabami can easily be found flying around Areas 7, 8, and 9 of the Iceshard Cliffs afterwards.
Hirabami weaknesses
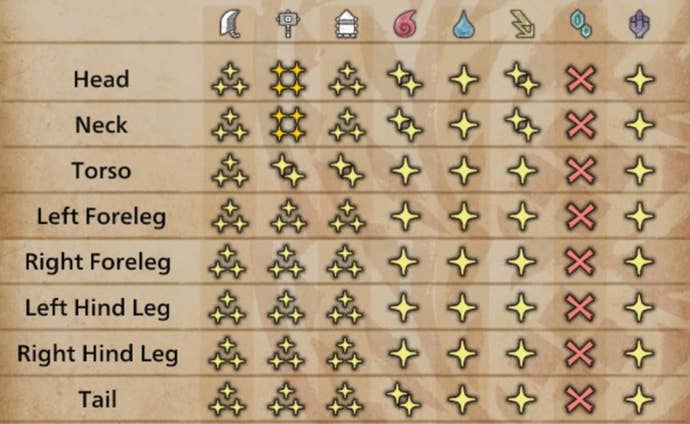
The Hirabami's weak point is its mouth, or more generally its head and neck region. Unfortunately, the mouth can be tough to reach as this airborne monster is often floating above you and has difficult-to-follow movements. Luckily, you can do some decent damage by targeting the legs and tail, at least until the Hirabami lands on solid ground. Switch to attacking the head and neck when this occurs, prioritising a weapon that deals Blunt Damage.
Thunder and Fire Element damage are your best bet against the Hirabami. Thunder will be most effective on the creature's head and neck, and Fire works well on the tail. Don't bother with Ice damage, as the Hirabami is completely resistant to it.
Poison and Sleep are the most effective status effects against the Hirabami, though if you're using a Blunt weapon, you might get some mileage out of going for Stun. Be sure to stock up on Flash Pods and Shock Traps before the fight - and of course Dung Pods, which we'll explain in greater detail in our tips and strategy section below. Since the Hirabami fight takes place in a cold climate, you'll also need Cleanser and Hot Drinks to stave off Frostblight and keep your Stamina from falling.
Best weapon and armor to fight Hirabami
Blunt damage works especially well against the Hirabami, so a Sword and Shield or Hammer might be your best bet in this fight. If you care more about mobility and matching the Hirabami's flying movements, go with a face-paced weapon like the Dual Blades, or the Insect Glaive, which can send you airborne and match you with the Hirabami's level. Using a ranged weapon like the Bow is also useful if you'd rather not get close. You can't really go wrong with any of these weapon types - it all depends on how you decide to approach the Hirabami.
The first time I faced the Hirabami, I was using weapons from the Rompopolo Tree, more specifically the Rompo Wrecker I. You can also go with Lala Barina Tree weapons, which are associated with Paralysis and handy in this battle.
Go with whichever armor confers the best physical defence when you're fighting the Hirabami. Once you've carved up your first few Hirabami, you can build Hirabami armor, which gives Ice resistance and is pretty useful when it comes to farming more of these frosty leviathans.
Hirabami tips and strategy
Below, we'll go in-depth with the main tips and overall strategy you need to beat the Hirabami. Follow these hints closely to win the fight and claim the spoils of war with ease.
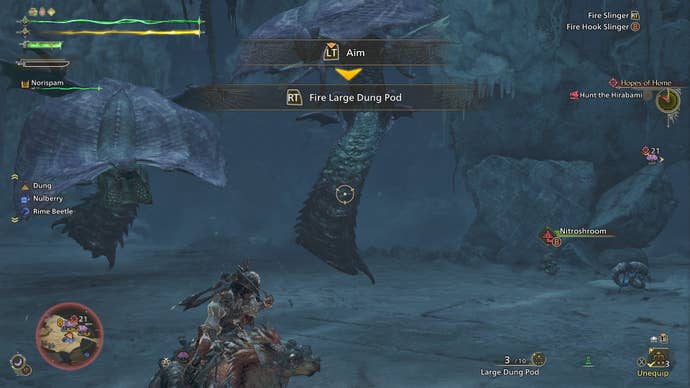
1. Stock up on Dung Pods and Large Dung Pods
You'll end up facing three Hirabami in the main story during your first meeting with these wyverns. You're supposed to use Dung Pods to make the pack disperse, but I ran out of poop missiles and had to tackle all three at once, at least for a brief while. Save yourself this headache by always ensuring that you have a stockpile of Dung Pods and Large Dung Pods when embarking on a Hirabami hunt.
2. Use slinger ammo or ranged attacks to knock the Hirabami out of the sky
If you've got a ranged weapon, unleash it on the Hirabami, preferably with Flaming or Thunder ammo. If you're sticking with a melee weapon, then use your trusty slinger to offload Thunder Pods and Flash Pods, both of which are highly useful during this fight. Flash Pods in particular are great especially if you need to blind more than one Hirabami, which leads to my next tip...
3. Watch out for the Hirabami's icy projectiles.
I mentioned earlier that I got stuck fighting multiple Hirabami at once during my first encounter with them. It was more than a little chaotic, and the toughest part of it was avoiding the icy projectiles that the Hirabami fires. If you get hit with one of these, you'll be stuck with the Frostbite condition. Remove it with Cleanser as soon as you can. It's awfully hard to predict exactly when a Hirabami is about to fling ice at you, so the best advice I can give is to stay mobile throughout this fight and never linger in the same place for too long. Once again, the Insect Glaive can come in handy here due to its additional mobility.
4. Attack the tail until the mouth becomes available
The Hirabami might usually be in the sky, but its tail is often accessible from the ground. Slice at it and unleash Fire attacks until the Hirabami falls downwards, and then instantly focus on the mouth for maximum damage. Over the course of the fight, you'll also become pretty familiar with the Hirabami's telegraphs before it attacks with its tail. Dodge out of the way anytime it floats over you and raises its tail, because an incoming slap is imminent.
5. Take note of the environment and use loose rocks to damage the Hirabami
The Iceshard Cliffs are full of floating platforms and rubble, so monitor the terrain whenever you're fighting a Hirabami. Always be on the lookout for environmental features that you can use your grapple to pull. Yanking on a pile of rocks and watching as they topple into the Hirabami is both highly satisfying and super effective.
Hirabami rewards and drop list
Here are all the rewards and drops you can get from Hirabami and its broken parts.
Low-Rank Materials:
| Materials | Frequency | Value | Target Reward | Carving Reward | Wound Destroyed |
|---|---|---|---|---|---|
| Hirabami Tail Claw | 4 Star | 880z | 10% | 15% | -- |
| Hirabami Scale | 3 Star | 440z | 22% | 35 | 45 |
| Hirabami Hide | 3 Star | 660z | 20% | 30% | 43% |
| Hirabami Webbing | 2 Star | 792z | 15% | 20% | 12% |
| Frost Sac | 2 Star | 660z | 23% | -- | -- |
| Hirabami Certificate | 1 Star | 440z | 8% | -- | -- |
High-Rank Materials:
| Materials | Frequency | Value | Target Reward | Carving Reward | Wound Destroyed |
|---|---|---|---|---|---|
| Hirabami Tail Claw+ | 4 Star | 2280z | 10% | 15% | -- |
| Hirabami Scale+ | 3 Star | 440z | 22% | 33% | 45% |
| Hirabami Hide+ | 3 Star | 660z | 22% | 27% | 43% |
| Hirabami Webbing+ | 2 Star | 792z | 15% | 20% | 12% |
| Freezer Sac | 2 Star | 660z | 20% | -- | -- |
| Hirabami Certificate S | 1 Star | 440z | 8% | -- | -- |
| Wyvern Gem | 1 Star | 4000z | 3% | 5% | -- |
In addition, if you break the following Hirabami parts during the fight, you'll get these rewards for carving them:
Low-Rank Materials:
- Tail: 1x Hirabami Tail Claw
- Head: 1x Hirabami Webbing
High-Rank Materials:
- Tail: 1x Hirabami Tail Claw+
- Head: 1x Hirabami Webbing+
That wraps up our strategy guide on how to beat the Hirabami in Monster Hunter Wilds. For more help, head to our Monster Hunter Wilds walkthrough and our expansive list of all monsters in the game!